Toggle navigation

Mucha

Version 1.0.0

Mucha theme is the latest WordPress page builder base theme. which helps you to build multiple sites according to your choice.

Installation

Follow the steps below to get started with your WordPress Theme

  1. Now Login to WordPress Admin Dashboard.
  2. Go to  Appearance> Themes > Add New >  Upload theme.
  3. Upload mucha.zip and Activate themes.

Installing Plugins

When you click on the “Activate” button to activate Mucha Theme, you will see the notice offering you to install required and recommended plugins.

Click “Begin installing plugins“, on the screen that appears, next select the plugins you want to be installed, pick “Install” in Bulk Actions select box and click “Apply” button. For optimal user experience install and activate all recommended plugins.

Import Demo Data

We are providing our own demo importing plugin so if you like and want to demo like website in your site then you can easily import the demo and set up on your site.

Steps to import demo data:

  1. After activated Theme One Click Demo Import from a plugin.
  2. you will get the Import Demo nav in your dashboard.
  3. Click on Import Demo You will get all the demo available:
  4. Click on the Import and follow the process as shown in the video. Link is here:

Step to Add New Post

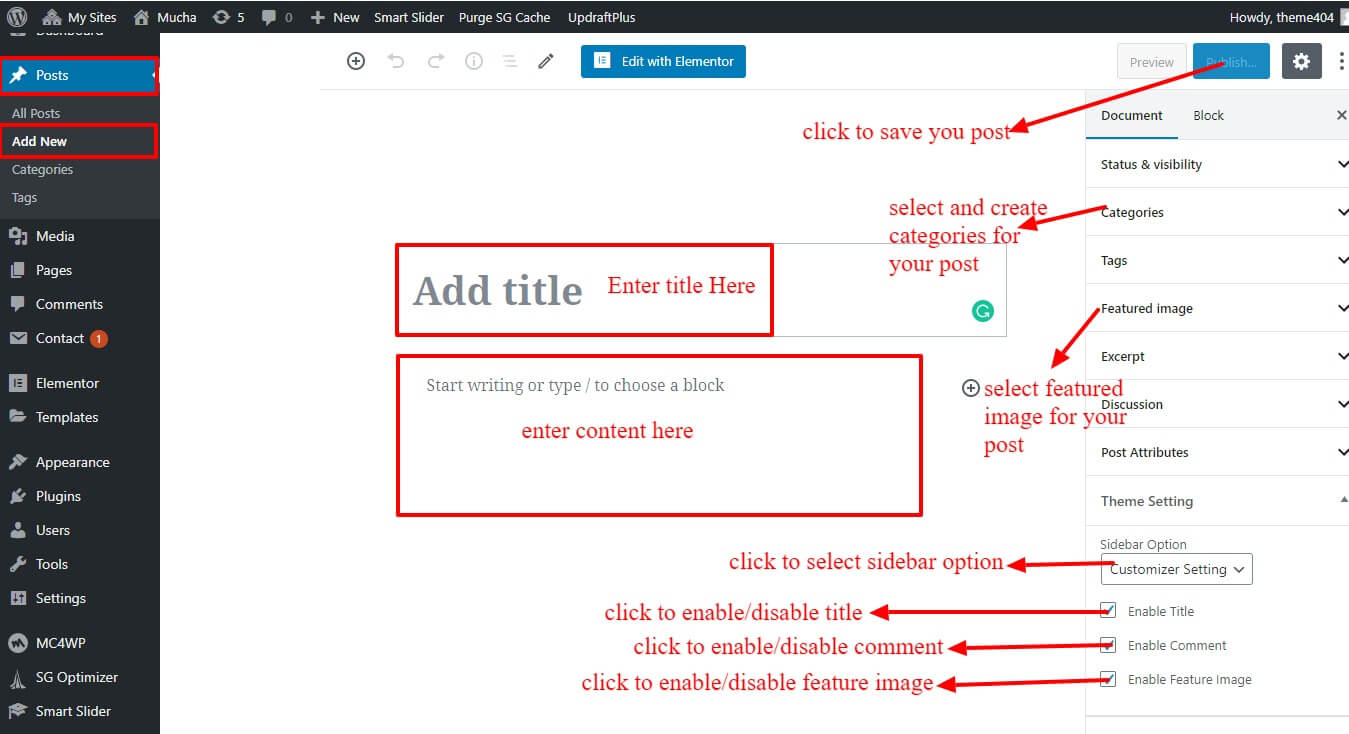
  1. Go to Post, Click Add New.
  2. Add Title, ContentFeature Image and Categories.
  3. Click on Publish.

Step to Add New Page

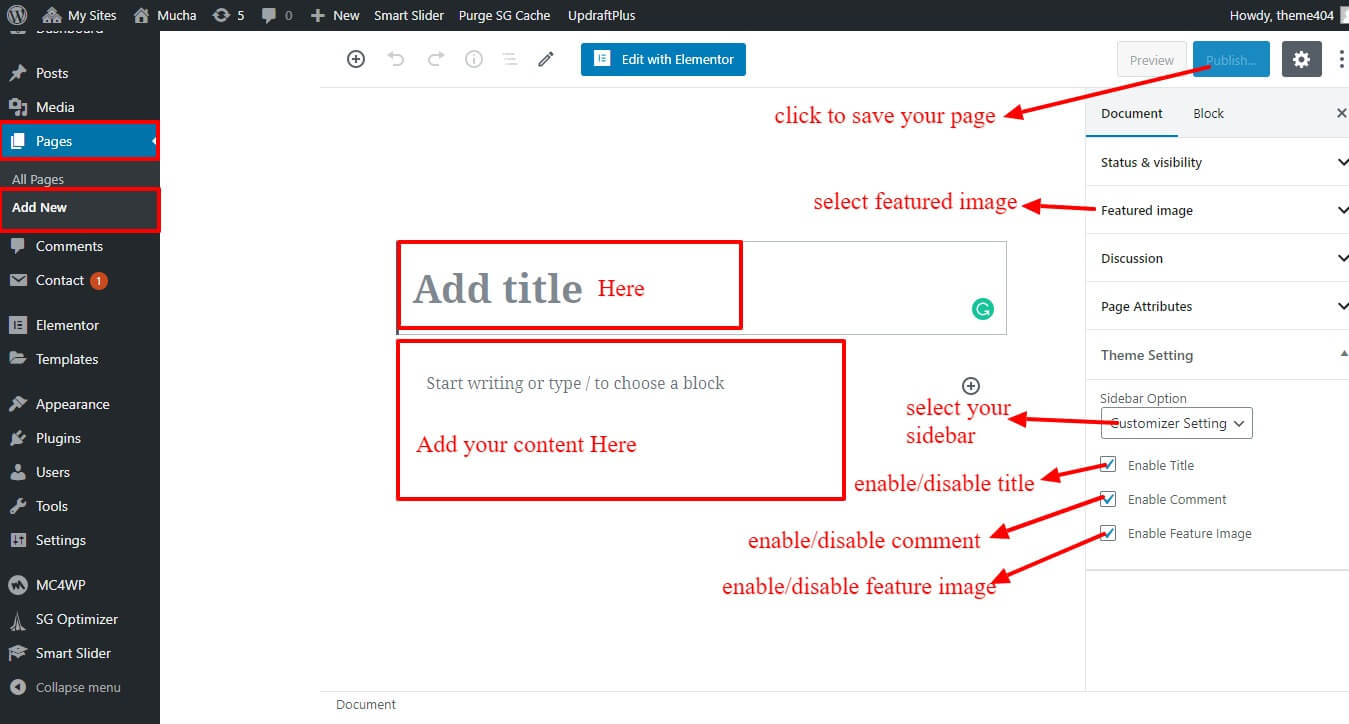
  1. Go to Page, Click Add New.
  2. Add Title, Content and Feature Image.
  3. Click on Publish.

Elementor

Since Mucha’s demos are based on Elementor, So you can directly customize your page with Elementor. there is two way to get the Element editor page.

  1. From your dashboard
    1. Go to Pages > All Pages.
    2. Choose the required Page.
    3. Click Edit with Elementor.

OR

  1. The front side of your site
    1. Go to the front side of your site.
    2. Choose the required Page.
    3. Click Edit with Elementor

You can easily edit any part of your page by going to the Element Editor page.
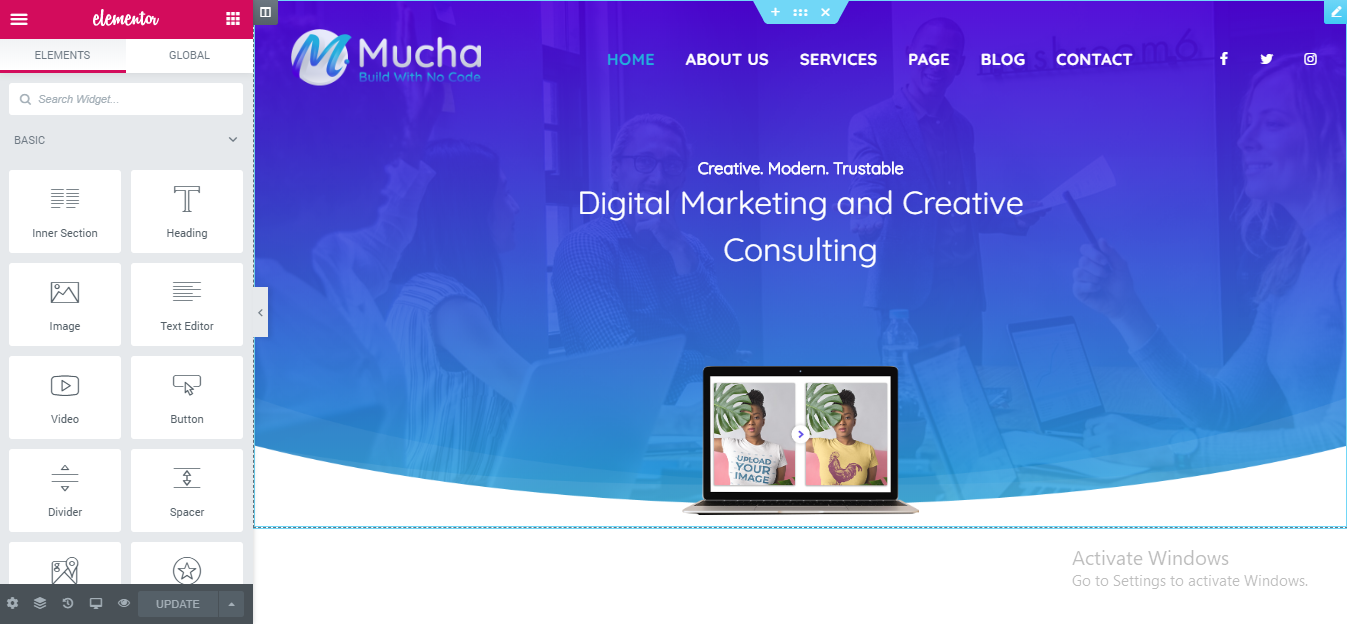
how to edit elementor pages in Mucha theme

Note: If the Edit Using Elementor option is not visible for a page on both the front page and the dashboard, it means that the page was not built using Elementor. To edit this page using the elementor, go to pages> all pages, hover over it, and click the Edit button. Now click the Edit Using Elementor above the page editor.
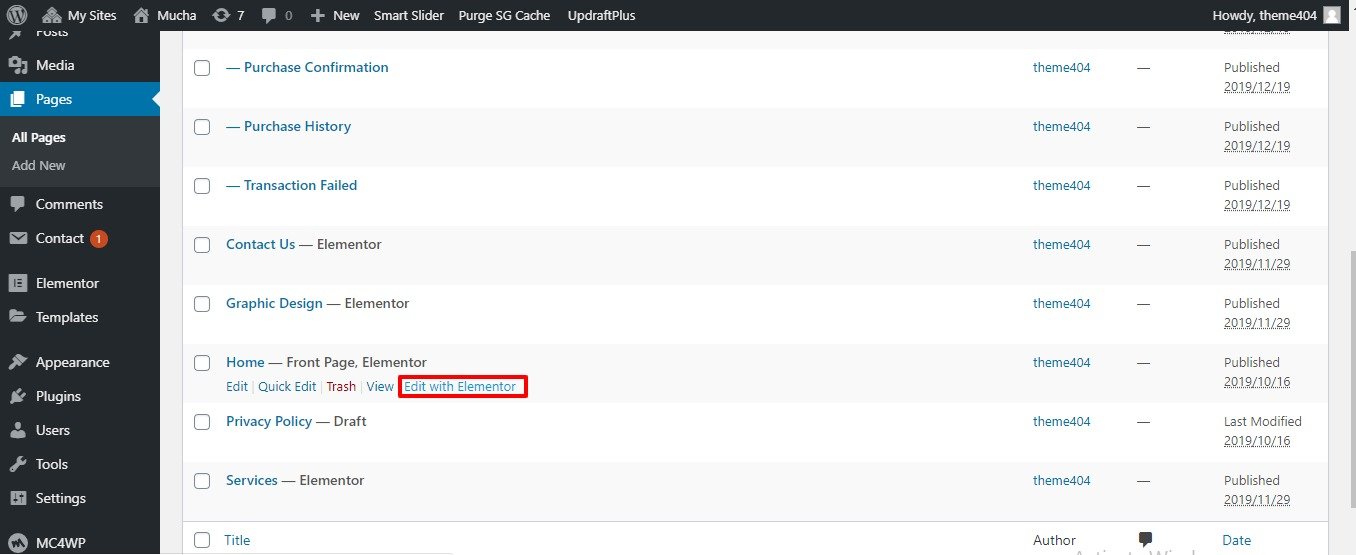
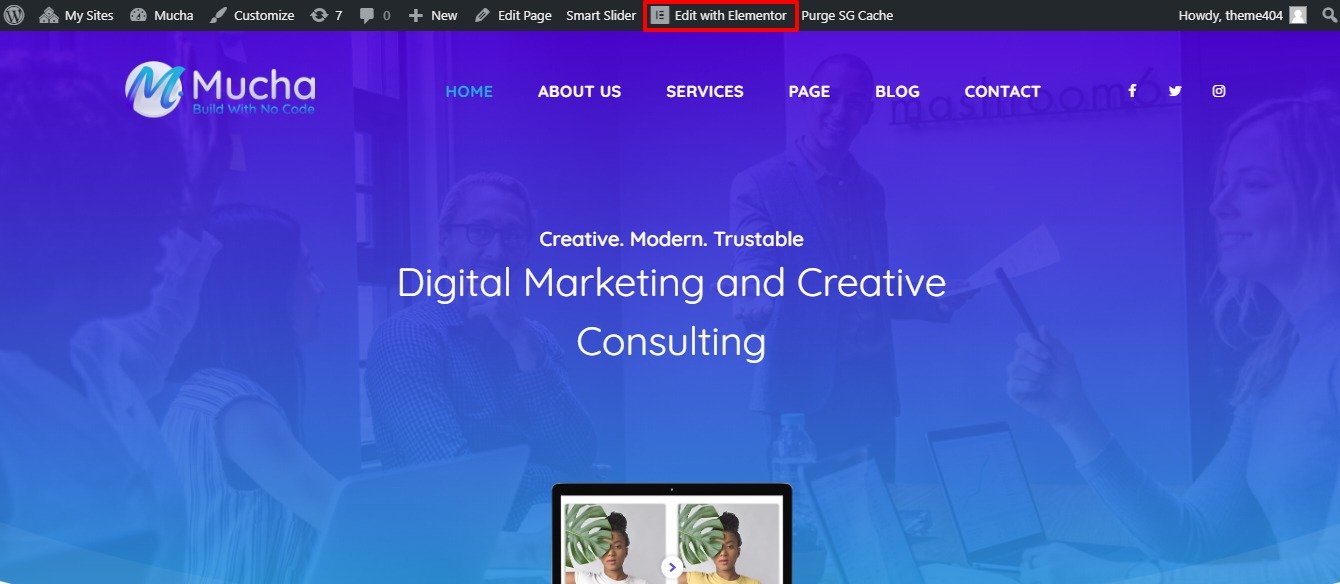
From Dashboard


From front side

Steps to editing your page

You can customize your page in Elementor using different widgets. If you click on the part you want to edit, the corresponding section of the article will appear on the left. You can then use the configuration to resolve the section.

Few of them are mention below:
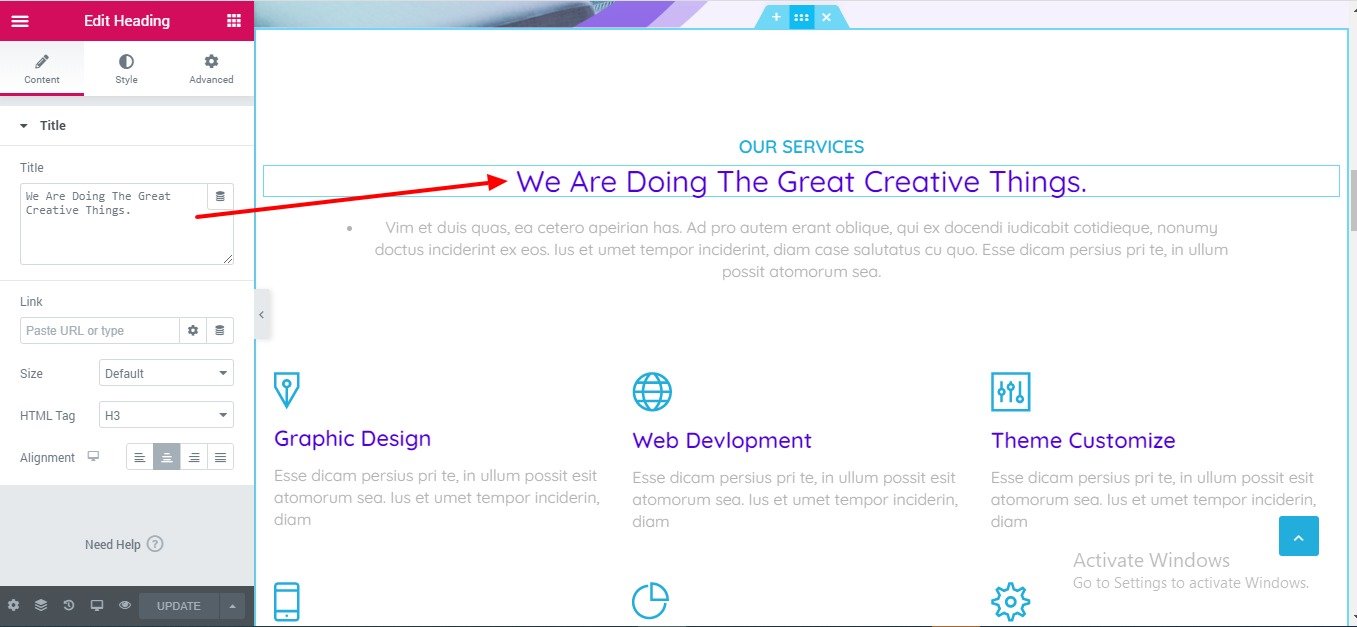
Edit heading with Elementor


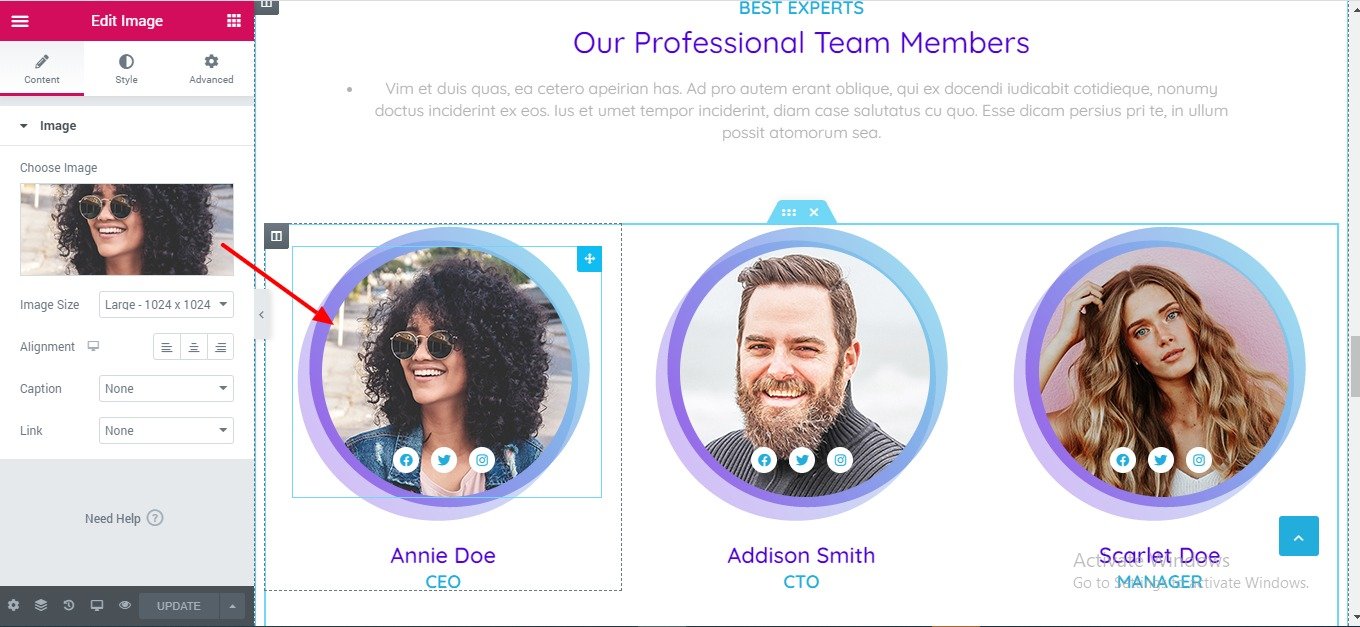
Edit Image with Elementor


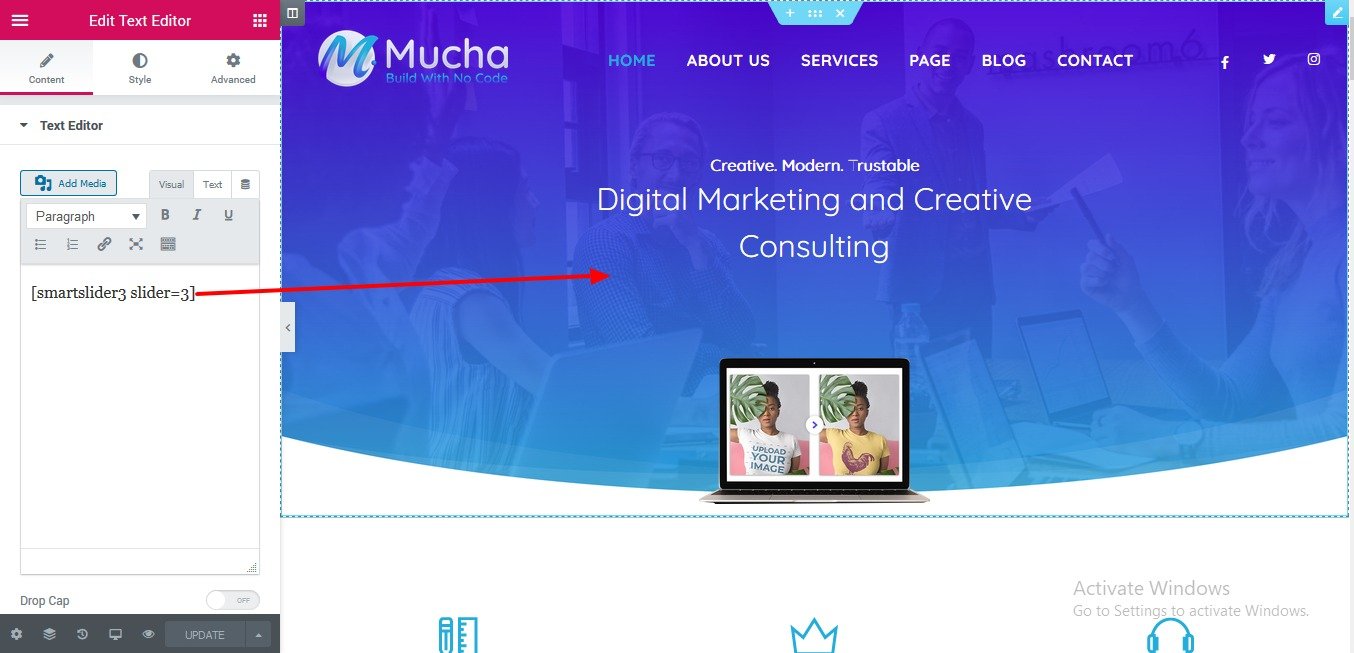
Inserting smart slider plugin shortcode with elementor
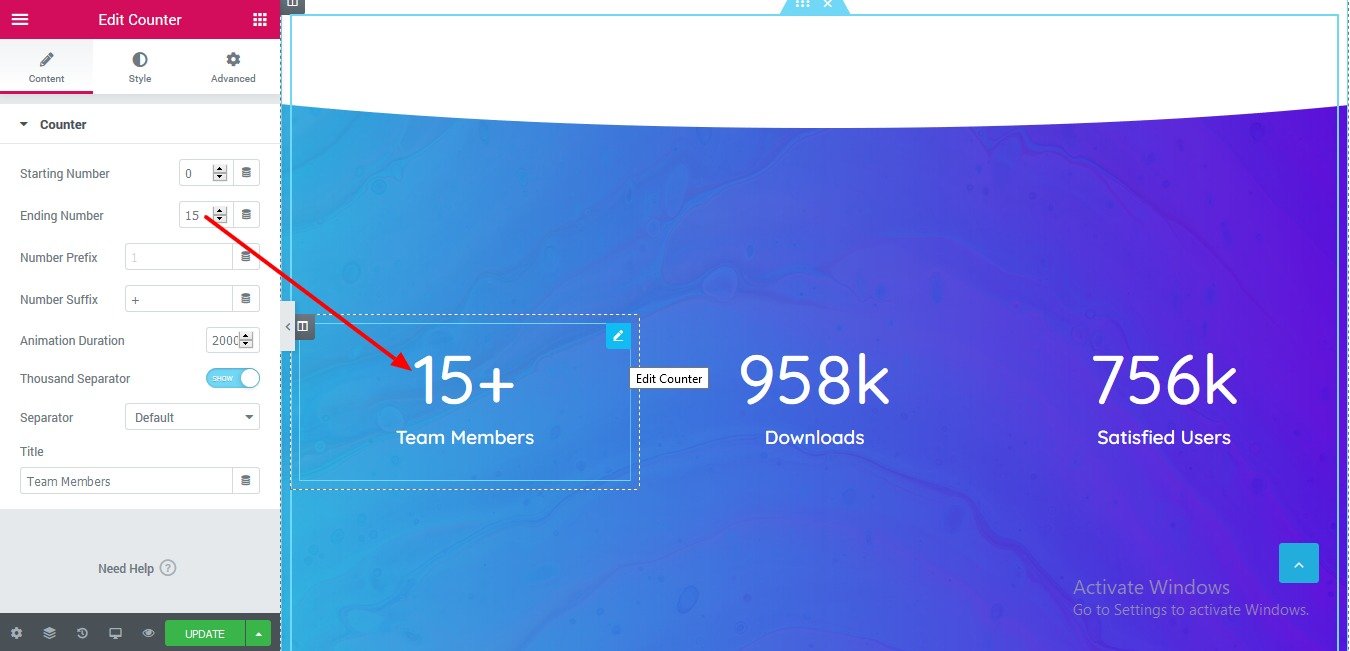
Edit counter with Elementor


Note: If you want to learn about Elementor in detail, visit their site at https://docs.elementor.com
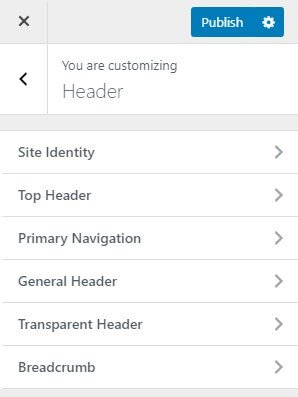
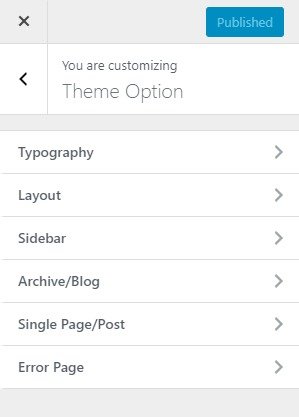
  1. Go to Appearance > Customize > Theme Options.
  2. You will get different options and Setting as shown in the screenshot.


Typography

Typography will give you options to control the looks of the Typography of your site.Go to Appearance > Customize > Theme Options >Typography.
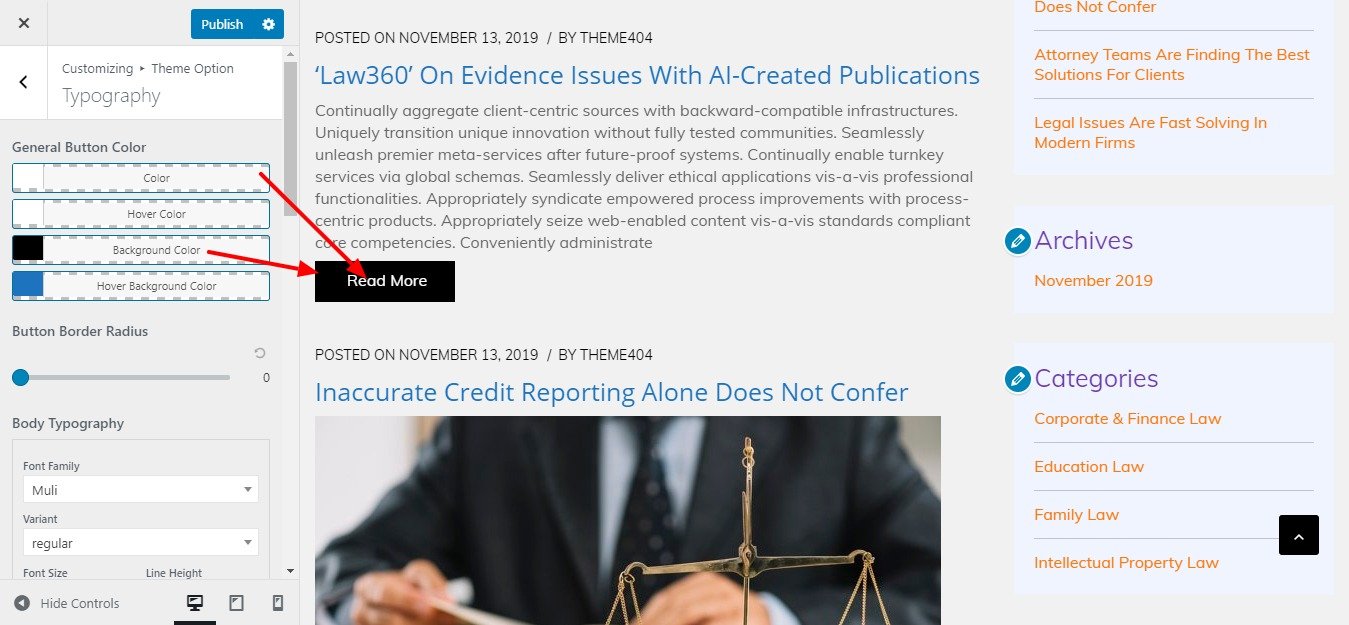
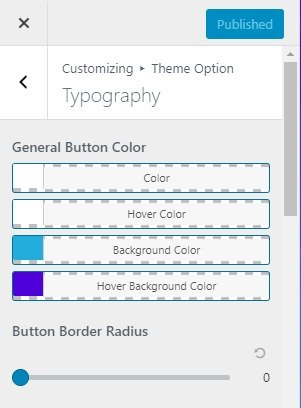
  1. General Button Color: This option allows you to choose General Button Color
  2. Button Border Radius: This option allows you to choose the Button Border Radius
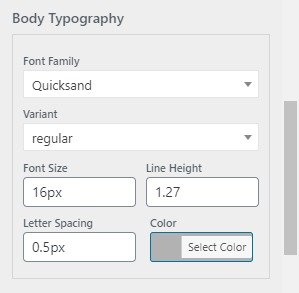
  3. Body Typography: This option allows you to choose Body Typography.like font family,font-size, color, etc.  
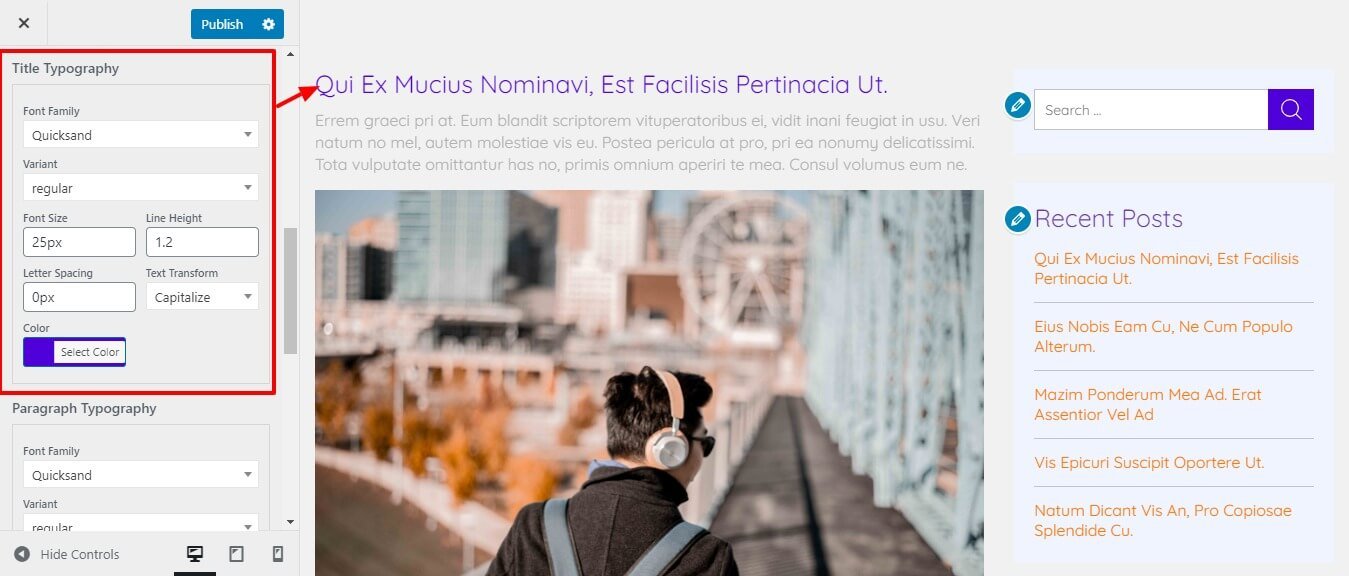
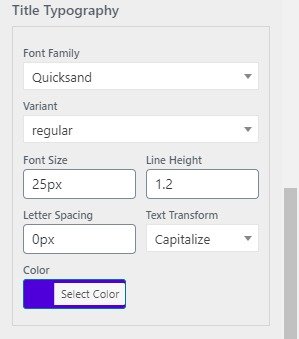
  4. Title Typography: This option allows you to choose Title Typography.like font family,font-size, color, etc.
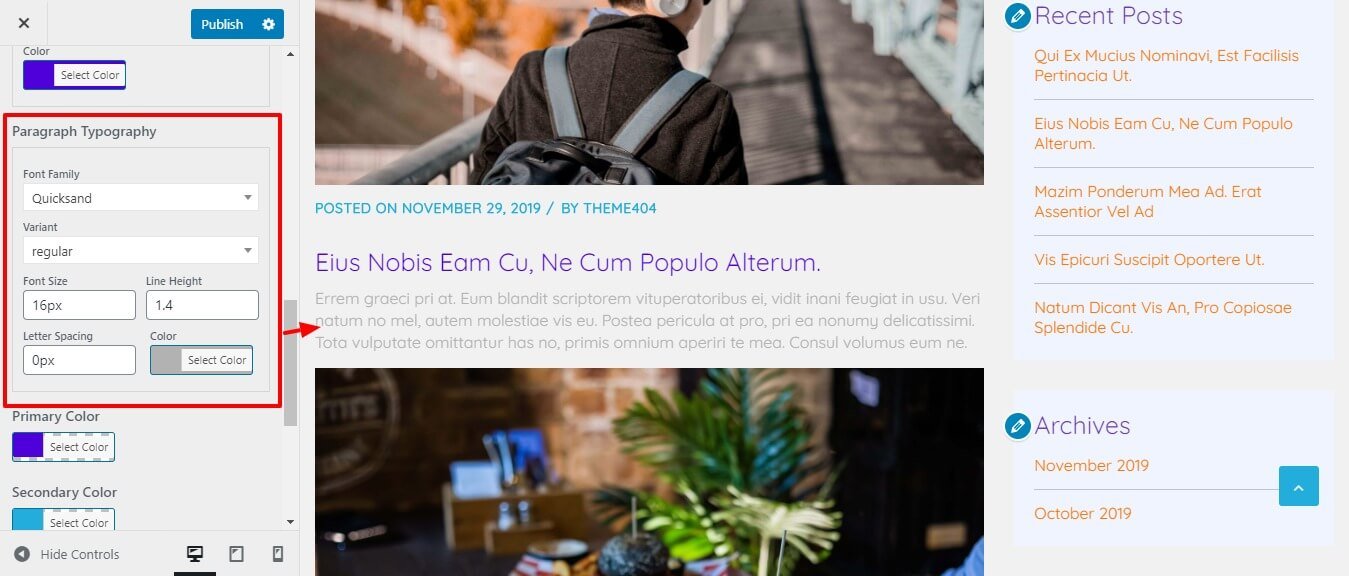
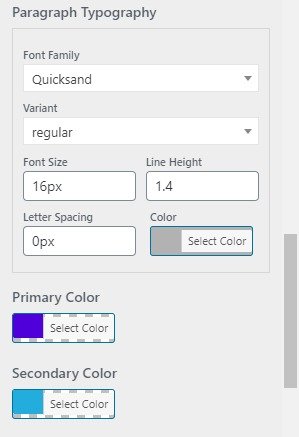
  5. Paragraph Typography: This option allows you to choose Paragraph Typography.like font family,font-size,color etc.

    Editing paragraph typography
  6. Primary Color: This option allows you to choose Primary Color.
  7. Secondary Color: This option allows you to choose Secondary Color.
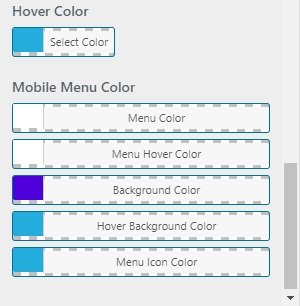
  8. Hover Color: This option allows you to choose Hover Color.
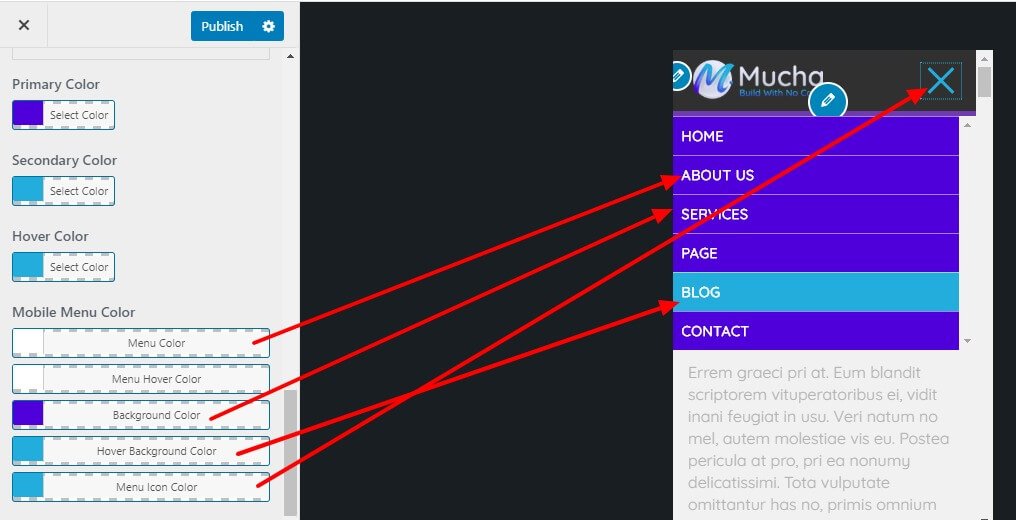
  9. Mobile Menu Color: This option allows you to select mobile menu color.

Layout

The layout will give you options to control the looks of the layout of your site. Go to   Appearance  > Customize > Theme Options >Layout.
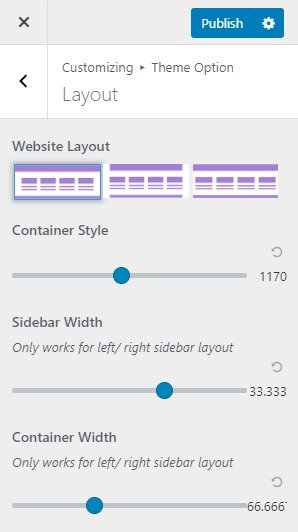
  1. Website Layout: 
  2. Container Style: Container Style.
  3. Sidebar Width: Sidebar Width.
  4. Container Width: .


Archive/Blog

Archive/Blog will give you options to control the looks of the Archive/Blog of your site.Go to Appearance > Customize > Theme Options >Archive/Blog.
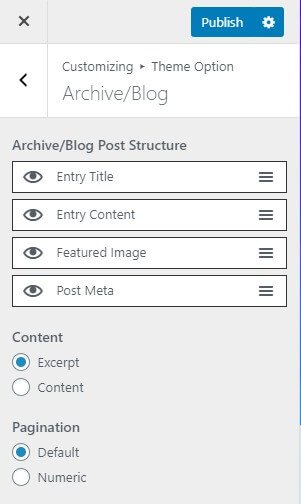
  1. Archive/Blog Post Structure: This option allows you to drag and drop the Archive/Blog Post Structure.
  2. Content: This option allows you to choose Content.
  3. Pagination: This option allows you to choose Pagination.

Single Page/Post

Single Page/Post will give you options to control the looks of the Single Page/Post of your site.Go to Appearance > Customize > Theme Options >Single Page/Post.
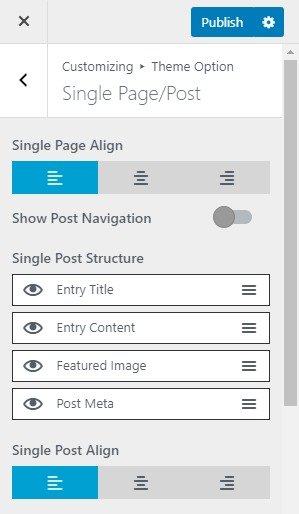
  1. Single Page Align: This option allows you to choose a single-page to align.
  2. Show Post Navigation: This option allows you to enable/disable Show Post Navigation.
  3. Single Post Structure: This option allows you to choose Show Post Navigation
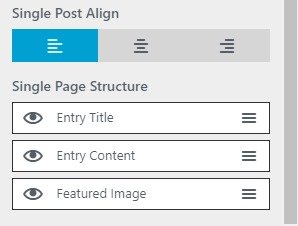
  4. Single Post Align: This option allows you to choose Single Post Align.
  5. Single Page Structure: This option allows you to choose Single Page Structure.

Error Page

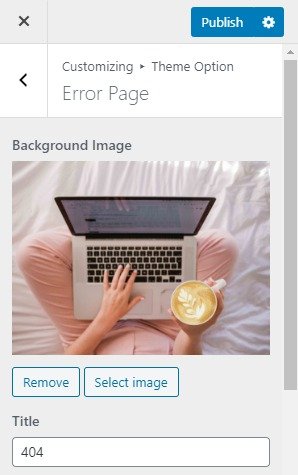
Error Page will give you options to control the looks of the Error Page of your site.Go to Appearance > Customize > Theme Options >Error Page.
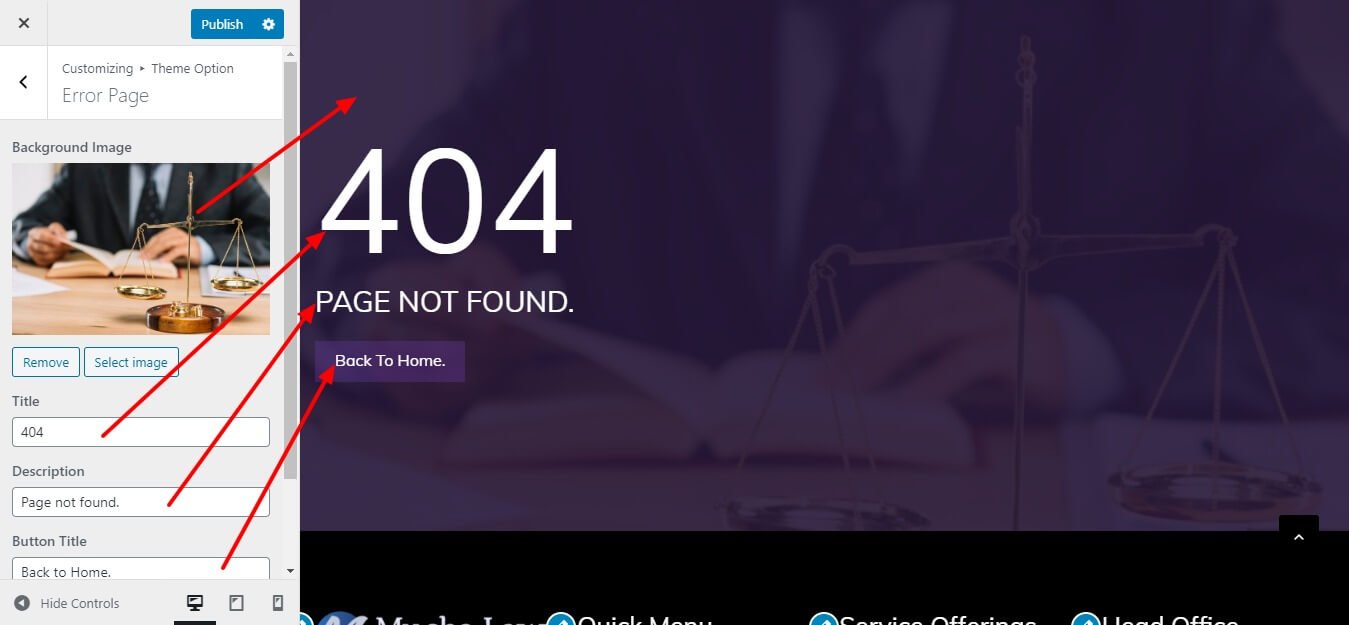
  1. Background Image: This option allows you to choose Background Image.
  2. Title: This option allows you to edit the title.
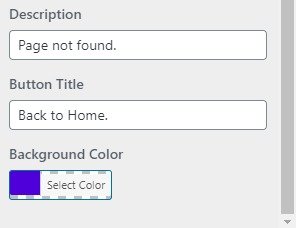
  3. Description: This option allows you to edit the description.
  4. Button Title: This option allows you to edit a button title.
  5. Background Color: This option allows you to select a background color.

Go to Appearance > Customize > color. where you can see Background Color Options  sections.

  1. Background Color: Select the color available in the options. If the preview is fine, click on Publish to apply recently selected Background Color.

Go to Appearance > Customize > Header Image. Select the image for the header available on the media library or upload it from the other location.


Go to Appearance > Customize > Background Image.Select the image for Background available on media library or upload from the other location.If the preview is fine, click on  Publish to apply recently selected/uploaded image as Background Image.

Widgets are one of the most important aspects of this theme.

  1. From the Customize section, go to Widgets.
  2. From Widgets, you will see different sections to add widgets where you will be able to Add a Widget or Remove widgets by going to a particular widget section.
  3. And the added widget will be displayed in a particular section that you have added.
  4. Note: Make sure to add proper widgets in a proper widget area for the best result.

Available Widget Area

By default, your homepage will also display your post feed, listing all of your latest posts for visitors to see.
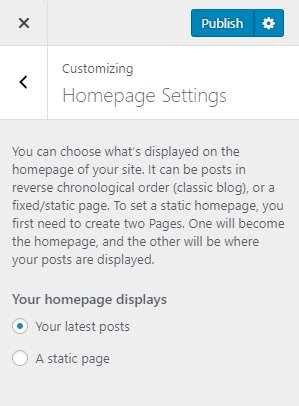
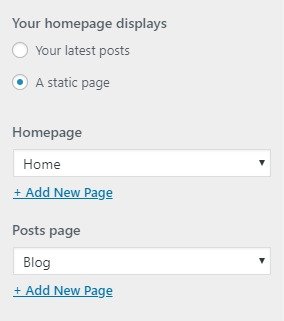
But  If you would like to instead have your homepage be a static page then your front page will display the content from the page you selected as Front Page. However the page you selected in Posts Page will become your blog page..
This is the option which will allow you to add your custom CSS. From Customize > Additional CSS. Additional CSS you will see: