Creating a Real Estate WordPress Site is easy using various themes available in the WordPress Theme Store. But we can’t assure that all of them give a desirable result to make a fully functional and attractive website. In simple words, to get a professional site, you need to think bigger and choose an effective Real Estate Theme.
Fortunately, there are plugins to implement complex features quickly. Just you need to pick the right combination of all tools. There are plenty of themes and their necessary plugins to establish an excellent foundation of the Real Estate websites.
Here is how to create a well-functioning and eye-catching Real Estate WordPress site. There are lots of Real Estate Themes designed with excellent features, such as Real Estater Pro.
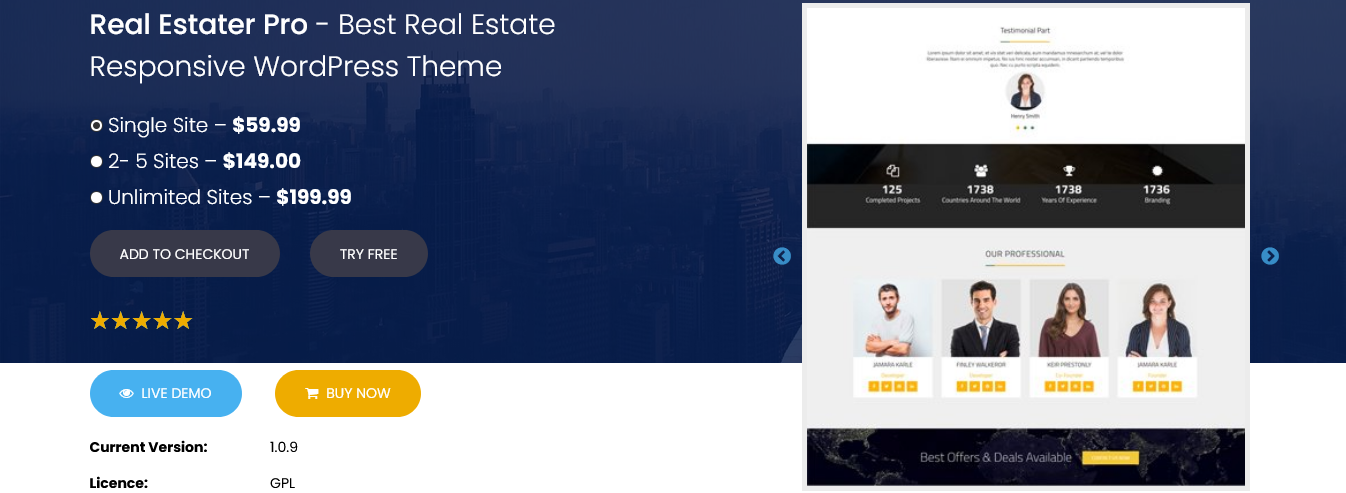
Real Estater is a premium WordPress Real Estate Theme that has been developed with the sole purpose of providing the option to create a professional-level website with ease. Crafted and designed with cut-throat competitions in mind, this template is the complete package of what you require. The design is sleek, modern, and of course unique to make sure your site stands out from the crowd. In addition to this, the template is paced with amazing elements and components that let the user easily aim and get the optimum results they are hoping for. It is best for apartment, house, listing, map listings, property, real estate, real estate application, real estate google maps, real estate listings, rental, rental listing.
To know what puts this theme on the pick of others, read this article “Introducing Real Estater: An Effective Way to Broaden Your Real Estate Business!”
Go through this article for complete step-by-step guidelines of how one can get a magnificent Real Estate WordPress site using Real Estater Pro Theme.
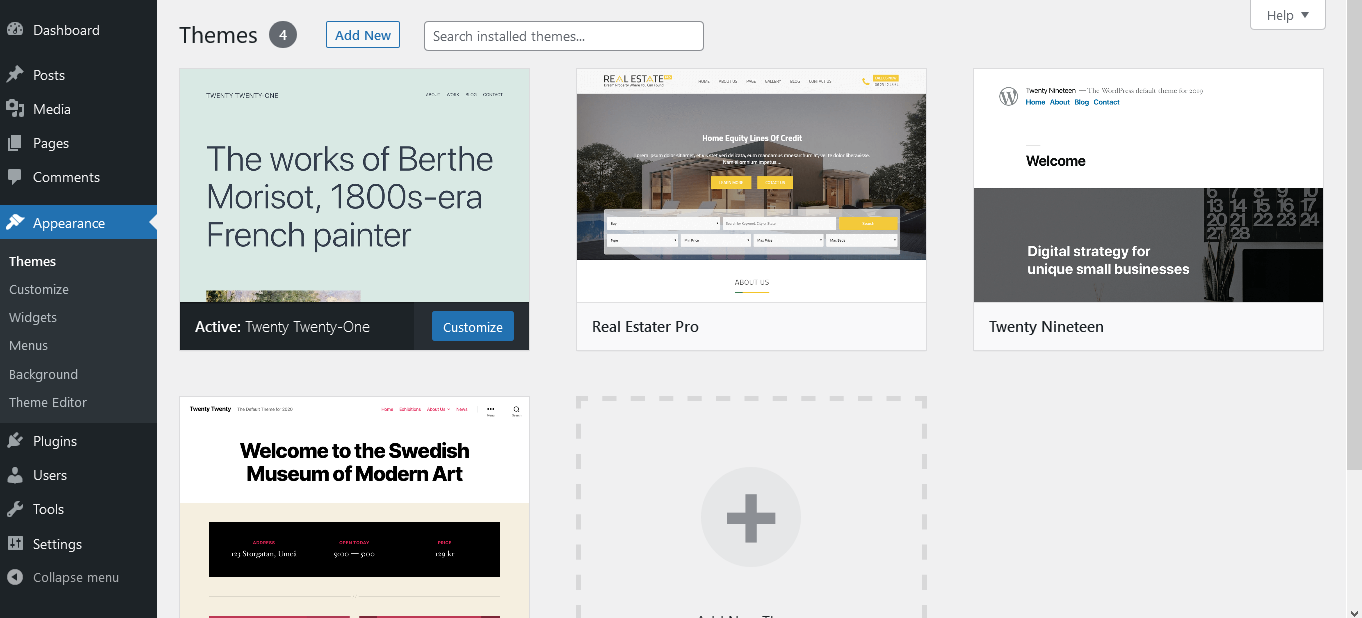
- Download Real Estater Pro from the Theme404 store. Add it to your WordPress installation folder inside: C:\xampp\htdocs\wordpress\wp-content\themes.
After the theme successfully added inside Themes, it will appear like this:
- Click on Activate the theme or you can also click Live Preview to view how your site will appear before installation.
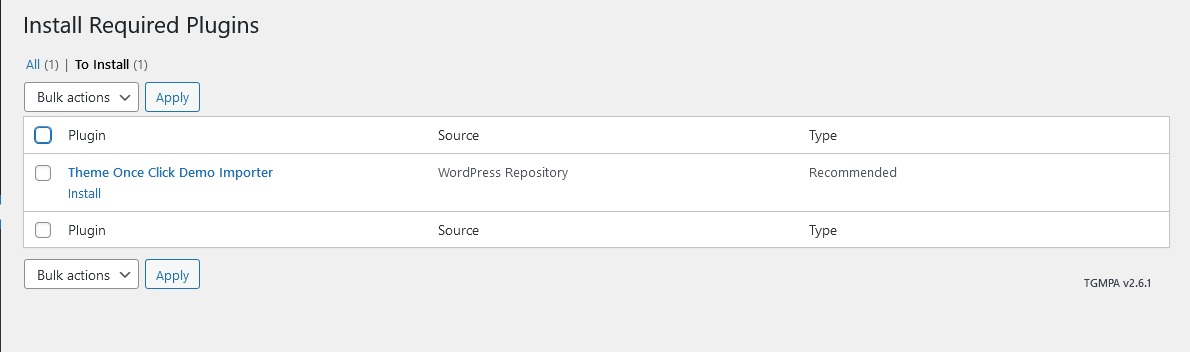
- When the theme activates, it will send you the notice to install some necessary and recommended plugins. Click “Begin Installing Plugins” on the screen that appears.

- There may be multiple plugins that the theme recommends to install, but you can pick an individual to install according to your requirement, or you can install all of them in bulk. For bulk installation, mark on the checkbox front of “Plugin” and click “Apply”.
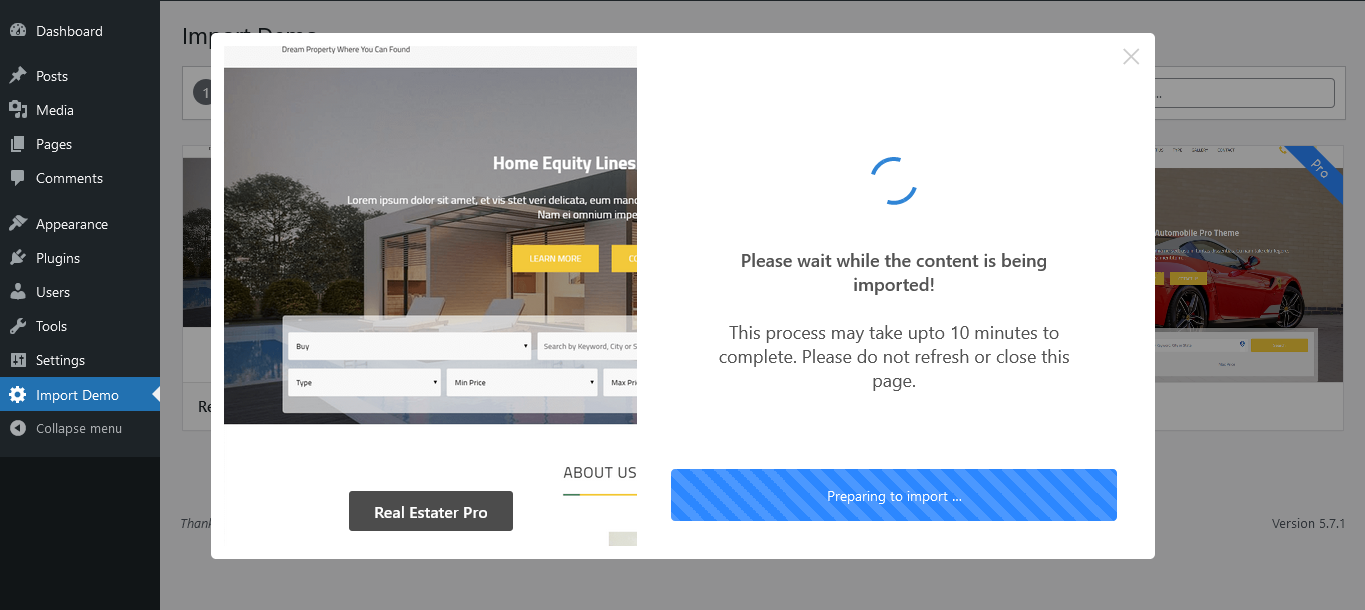
- If you want your site like the demo that the theme provides, you can simply implement One Click Demo Import and get a site ready within seconds.
After Activating One Click Demo Importer plugin, you can see the Import Demo section on your Dashboard. Click on the Import Demo and you will see all the demos available.
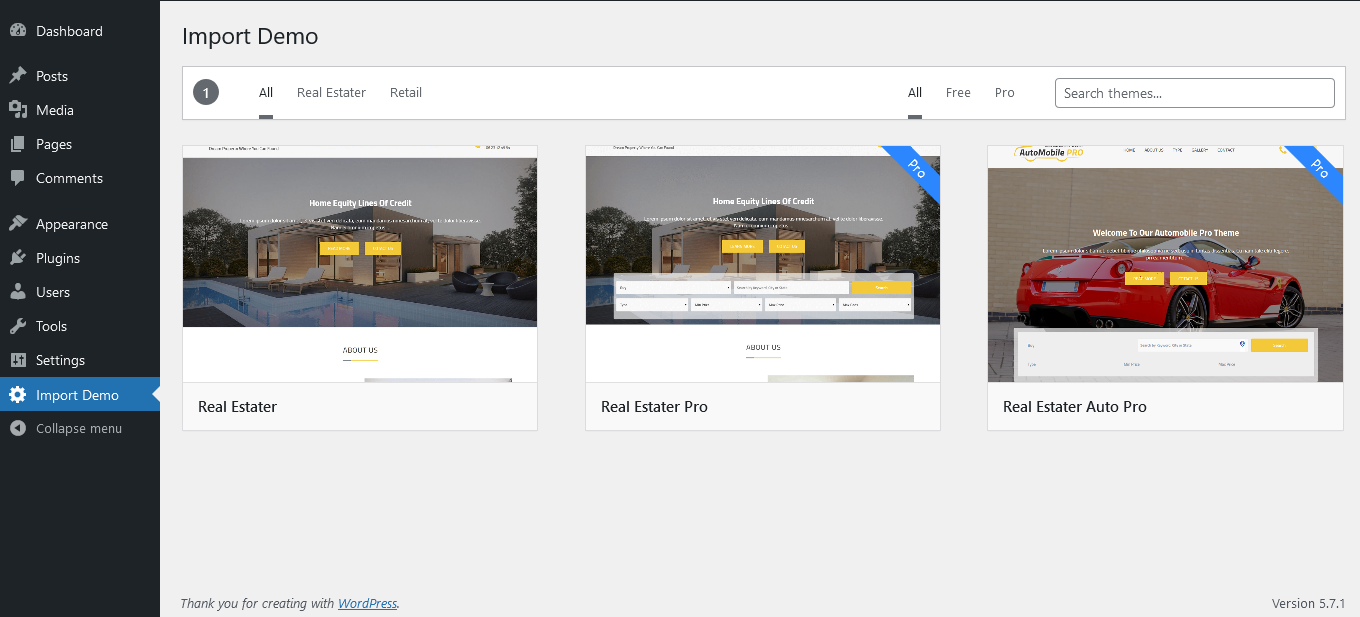
Click on the respective one you want to install and follow the process as shown in the video below:
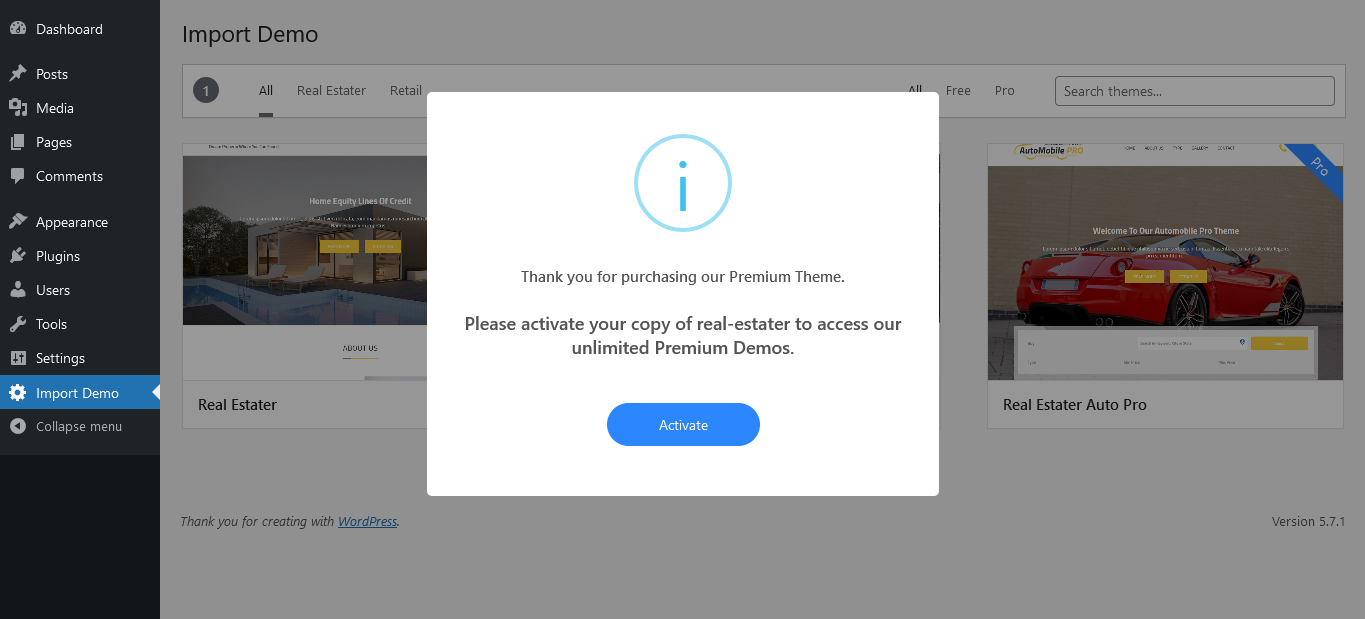
- Here I am using a demo of Real Estater Pro. Hence, I am gonna click on Import Demo for Real Estater Pro. That pops up a notification screen to activate a copy of the theme to get unlimited Premium Demos. Click on Activate.
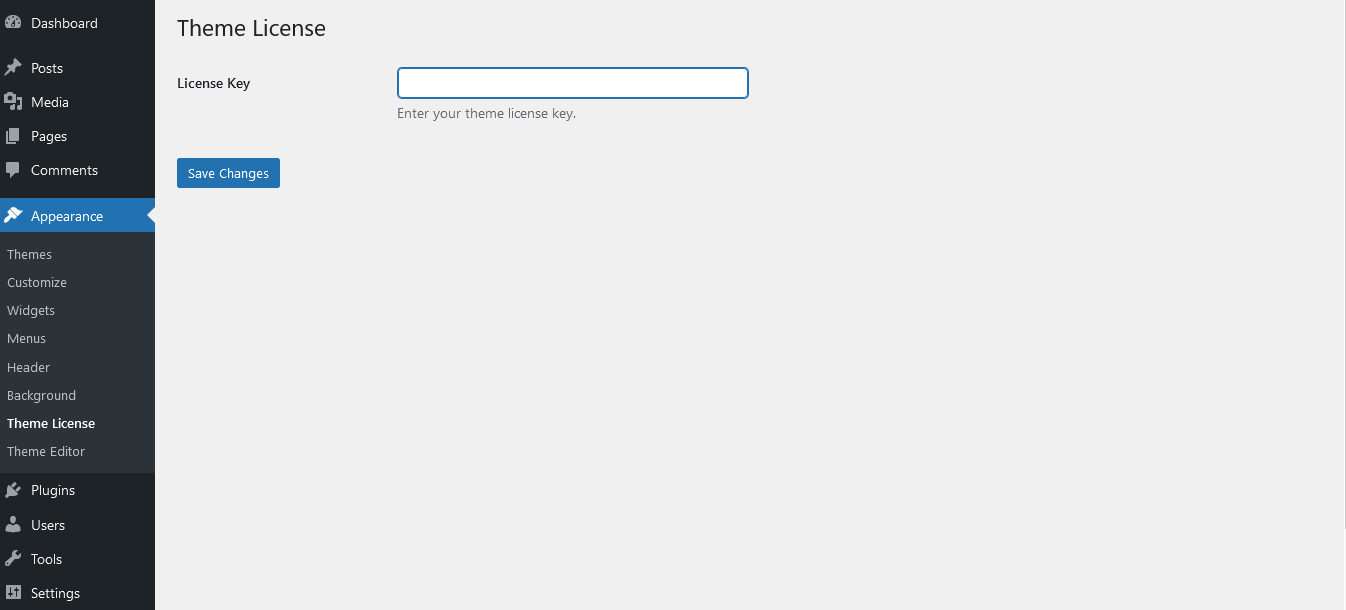
- It asks for a license key while activating the premium version. Enter a License Key you get while purchasing the theme. Then, click Save Changes and the screen appears with Activate License, click on that and again “Save Changes”.
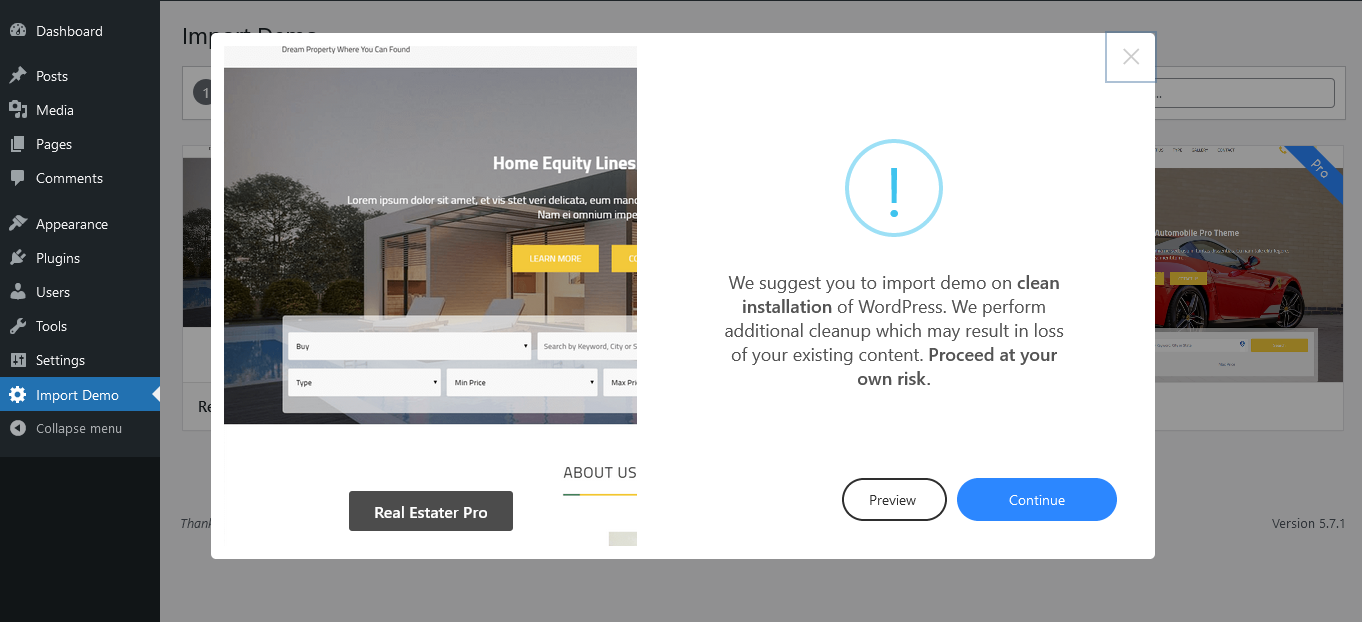
- Again, visit the Import Demo section on Dashboard. Preview all and Pick any of your favorite demos to import on your site. Click on Continue and proceed.
- If some of the necessary plugins haven’t installed yet, the theme will ask to install them. Click on Install Plugins, mark on Import Complete Demo, and wait for some minutes to complete the demo import.
- After the process completion, it gives you two options of “View Demo” and “Customize”. Here the site is ready with demo contents and you can begin customization to give a unique look to your site.
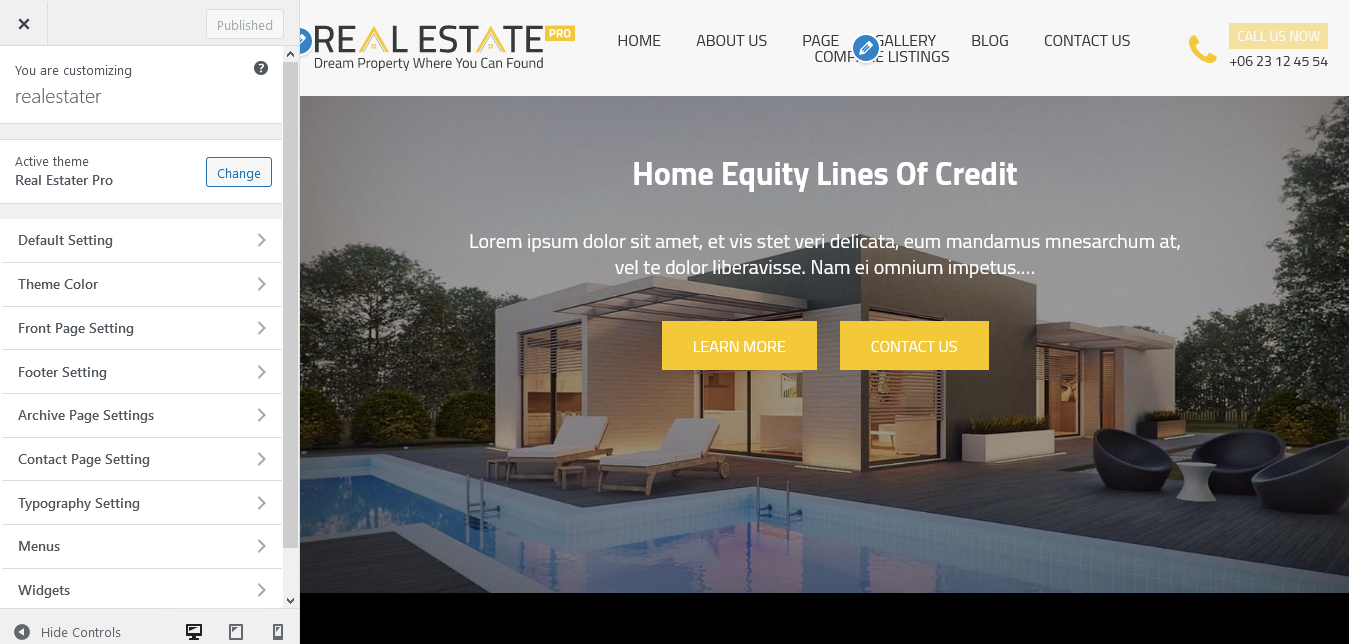
At Last, Real Estate is a field that keeps changing shortly. To create a perfect Real Estate site, you need to figure out how you can display your listing and keep it up-to-date. Real Estater Pro helps you to manage your site out of the box. For extra features, the theme facilitates you to customize and add new.